Lets have a Lawn
And why not? A lovely swathe of lush green grass to look out upon each day
and an outdoor ‘room’ to enjoy with family and friends – what’s not to like?
Lawns can be laid in Spring or autumn if you’re using seed,
and almost any time of year (except extreme heat or cold) if you’re using turf.
Do we have soil?
Gardens with new homes will generally be finished with a layer of topsoil, but it may be pretty lumpy, full of weeds and stones and be more akin to the Cullins of Skye than a lawn in East Lothian! And with the best will in the world, if your garden has recently been a building site, what’s under the layer of topsoil may not be too good. Check out the depth of topsoil that has been provided and what is underneath it by digging a couple of pits. Although grass will grow in relatively shallow soil, it’s a good time (before you plant anything) to investigate exactly what you’re dealing with, and bring in additional soil if required.
Level, sloping or tiered?
If you have a lovely level area, you can begin to prepare the ground immediately.
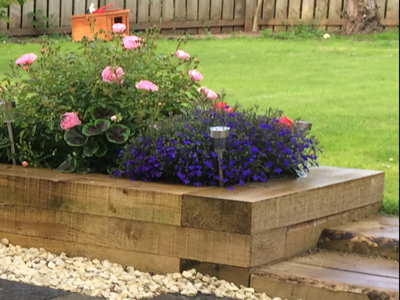
But if you have a sloping site, now is a good time to think about whether you want to keep the slope or whether you’d prefer a level lawn, in which case you’ll need to tier the garden. With tiers, you’ll need to think about how to retain the soil between the levels. You could use wooden boards, sleepers (as used in the picture), or build a brick or stone wall – apart from personal preference, factors to consider are permanency, the height between levels and budget.
Preparing the ground
Whether you decide to create your lawn with turf or seed, the preparation is very similar. You need to establish an area of well-graded soil that is free of large stones and weeds. Taking time at the preparation stage inevitably pays dividends later.
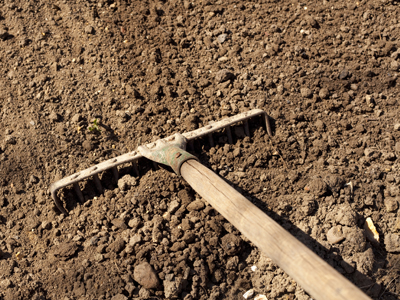
Assuming you’re happy that there is sufficient soil, and that the levels are as you want them, the next stage is to get the soil ready. As you’ll see from the picture, the soil in Adam’s new garden is very lumpy and so he decided to hire a garden renovator to break it up. Of course you can do it manually with a garden fork, but even Adam wasn’t that keen to save on his gym fees!
Once the big clumps have been broken down, you’ll need to rake the soil and unfortunately there is no mechanical substitute for this. But raking is healthy, outdoor exercise, so make a start!
We’d suggest that raking is progressive – start with a rough raking and work it until you have a lovely fine tilth (jargon for finely worked soil). Firstly, get rid of the worst stones working in one direction, then work the other direction and take off more, and continue working in different directions until you feel that you have a nice, even tilth that will form a perfect soil bed for seed or turf.
Use a roller between rakings and you’ll quickly see the undulations that need your perfect sculpting!
Once you’re satisfied that you’ve formed a nice, even soil bed, rake in some general purpose fertiliser.
 The tools you’ll need
As a minimum, you’ll need a fork and a rake. The handles are generally wooden or plastic but perhaps the more important consideration is the head which will either be constructed in carbon steel or stainless steel. We also suggest that you pay attention to the joint between the handle and the head as this can be the weakest point. If you’re looking for a guide about how robust the tool is likely to be, check out the guarantee that comes with it – the longer the guarantee, the better the tool.
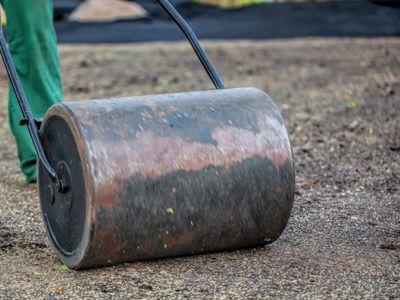
Your preparation and leveling will benefit enormously from the use of a roller. If you don’t have one, they are inexpensive to buy and could be re-sold once you’ve finished with it. Alternatively you could hire one, or have a roller-share with neighbours who are all doing a similar task!
 Choosing your grass
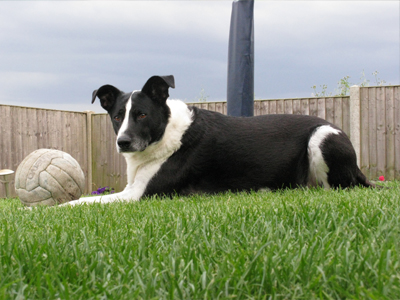
Grass seed for lawns (whether it is pre-grown turf or seed) is generally a mix of different types of grass. Designing seed mixes is a real specialism, with sporting venues continually demanding the highest-performing mixtures. Considerations such as the fineness and height of the grass, it’s rooting structure, wear-tolerance and seasonal colour are all taken into account when designing a grass seed mixture. So when choosing your grass it’s back to priorities again – is it more important to you that the grass will take a lot of wear, or are you looking for a bowling green finish?
Most turf-growers will offer you a choice based on what you’ll use the lawn for, and if you plan to sow from seed, all reputable brands will offer good advice on their packaging to help you choose the mix that’ll suit you best.
 Laying turf
We’re assuming that you now have a lovely level, weed and stone-free seed bed onto which you can lay your turf. Where possible, go directly to a reputable grower who will deliver it fresh and in good condition directly to your home. If you have to buy from a retailer, make sure you know which day they get their turf delivered and buy it that day – turf deteriorates very quickly after it is lifted and you want to minimise the time between the field and your garden.
DUE TO THE SHORT SHELF-LIFE AND THE DIFFICULTY OF MAINTAINING QUALITY, WE DON’T STOCK TURF AT MERRYHATTON.
– Begin laying the turf in one corner of the garden and continue to work in one direction, backwards on the soil – don’t lean on the new turf if at all possible
– Lay the turves in a staggered pattern (like the bricks on your house) so you minimise or eliminate the number of places where 4 corners meet. Remember that the corner of a turf is most likely to dry out first, so placing corners alongside an edge reduces drying out and helps the turves knit faster.
– Try not to indent the newly-laid turf – if you need to walk on – or work from – newly laid turf, use a board so that any weight is evenly distributed.
– Keep a bucket of sand or topsoil beside you, and use that to even out any minor undulations as the turf is being laid.
– ‘Grout’ between the turves with good topsoil- this helps them knit together, making the lawn stronger.
– A light rolling can settle the turf and help it root into the soil below.
– Water in well.
With newly-laid turf – and even relatively well-established turf during very warm periods – it’s really important to make sure the turf doesn’t dry out. In East Lothian we also get some very drying winds, which – believe it or not – can actually cause more dehydration than sunshine.
 Seeding your lawn
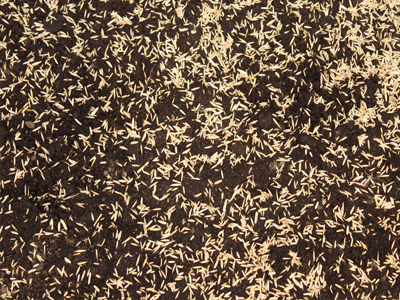
Choose a seed mix that is best matched to the way your garden will be used – is is a putting green or a football pitch? – and use a reputable brand to ensure a good level of germination.
Sowing rates will vary according to the mix you choose, and it’s important to follow the guidance on the pack if you want to achieve a good, thick lawn. To get a nice even spread, mark the area into smaller square areas – this makes it easier to be sure that you’re applying the seed at the correct rate. Many packs of seeds will incorporate perforations to help you spread the seed, but if you’re doing a larger area, a seed spreader will be a great help.
Once spread, lightly rake once again to work the seed into the soil. If the soil is fairly dry, give it a light roll – this helps the seed make contact with the soil and should help the seed germinate faster. (If the soil is very damp, don’t roll it – the last time I did that on damp soil, I ended up with all the grass seed on the roller and a very patchy lawn!).
Once raked – and if appropriate, rolled – it’s a good idea to lightly water your new lawn. This helps the seeds make good contact with the soil, and the moisture helps the seed coat soften, which in turn helps the grass to germinate.
When the grass has reached 2-3 inches in height, give it a further roll – preferably in two opposite directions. This settles the soil down, so that it doesn’t fly everywhere when you give your new lawn its first mowing! A couple of days later, once the grass has perked up again, you can mow it. Keep the blades high, and try to trim only the top third of the grass on the first couple of cuts. Once you’re confident the grass is firmly rooted, you can gradually lower the height of the cutting blades at each cut.

